

Four Panels You Will Actually Open
Four panels do the waiting, the watching and the practising, and every one of them opens from a button you have already been shown.
None of them changes the chart. They sit beside it, and the first is the one the book sends you to before any money is involved.
Everything in this lesson runs on the free plan, and nothing in it can lose you anything.
Driving the replay one candle at a time
Bar replay is a button on the top strip that looks like a rewind symbol. Press it and a small toolbar of its own appears under the chart.

The replay strip on its own, where the ringed button is the one that moves the chart forward by exactly one candle each time it is pressed. Charts by TradingView.
Six of its buttons decide where the replay begins and ends. Select bar and Select date put you on a day you choose, Select the first available day goes to the start, Random bar drops you somewhere you did not pick, and Jump to real-time chart returns you to today.
How much pressing that is
The seventh is Forward, and it moves the chart on by exactly one candle. That is the one this method uses, because a chart that arrives a day at a time is a chart you have to read rather than watch.
Play runs the same thing on a timer. Shift with the down arrow starts and stops it, Shift with the right arrow steps.
Simulated orders work inside a replay too, so the panel below can be used on a day that has already happened.
Where you start decides how long the whole thing takes, so it is worth knowing what a start date costs you in pressing.
Drag it to six months and the number stops being abstract. That is why the play button exists.
Two lists and one box on the right rail
The watchlist is the top icon on the right rail. The plus at its head opens the same search as lesson 2, and Alt+W adds whatever is on screen. The free plan keeps one list of thirty markets as this is written.
Further down that rail is the Alert manager, and Create alert on the top strip opens the same box. Everything that has fired lands in the Alerts Log, which is where to look when you are not sure whether an alert worked.
An order with nothing behind it
The Trade button sits at the top right. Under it, Paper Trading connects a simulated account in one click and nothing is deposited anywhere.
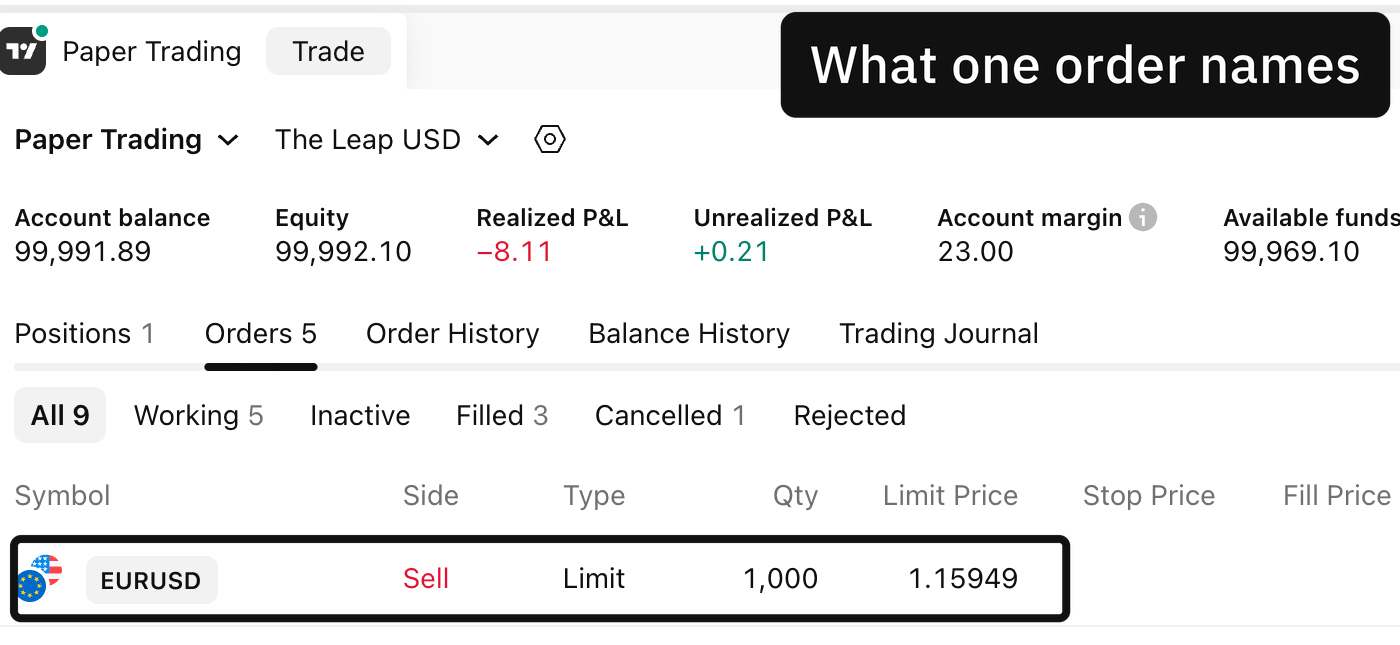
The trading panel docked under the chart, where the ringed row shows what one order is made of, the market, the side, the kind of order, the size and the price. Charts by TradingView.
The panel docks along the bottom. Its five tabs are Positions, Orders, History, Account history and Trading journal, and above them runs a row carrying the balance, the equity and what the account has made or lost.
Orders come from the order ticket, which asks for the side, the quantity, the kind of order, the price and whether a stop and a target ride with it. Place one and watch it land in Orders, then in Positions.
Replay is the top strip, and Forward is the button you press
The watchlist and the Alert manager are both on the right rail
The trading panel is behind the Trade button and docks along the bottom
A simulated fill is a cleaner fill than a real one, so treat the numbers as practice
The panel asks for everything a real order asks for. That is the point of it, and it is also its one limit.
Which leaves a question this manual cannot answer for you. How far back would you have to start before you would reach for the play button instead?
Where these facts come from
Every control name here, the replay buttons, the two keyboard shortcuts, the alert conditions and the five tabs in the trading panel were read off the platform's own help pages on the day this was written, and it can change any of them. The free-plan figures come from its published pricing. How long a stretch of replay takes to click through is this course's own arithmetic.